
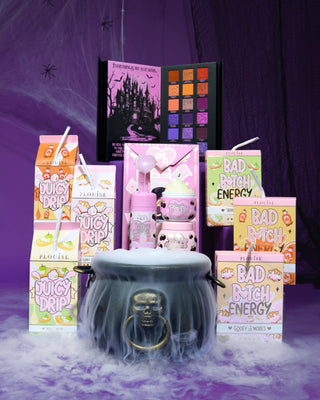


Halloween makeup doesn't have to be complicated babe, and often the messier the better at Halloween! Here we’re showcasing some gorgeous Halloween eye makeup looks that you can recreate at home and don't require all the fancy and expensive sfx equipment to achieve these!
Our guided tutorials will take you through each look step-by-step including which products we use so you can follow along and practice before Halloween.
Each look has been created by our professional makeup artist team so not only can you create the look but also learn some useful makeup artist tips - straight from the pros.
Jack Skellington Eye Makeup Look
@plmakeupacademy Spooky season is creeping closer… and Plouween is already in full force! 🕸️👻 Who’s ready for the tricks, treats, and all the glam that comes with it? 💀🖤 #plouisemakeup #makeup #plouise #halloween #halloweenmakeup ♬ original sound - PLOUISE
Step 1: Lay The Brows
Using our iconic Brow Balm, take a spoolie and brush the product through the eyebrows upwards and out, laminating the eyebrow to the skin flat. Use the plastic end of the spoolie to flatten the eyebrow down and allow time for this to dry before your next product.
Step 2: Create The Base
Using a #7071 flat brush, apply our viral Rumour Base in a shade that matches your skin tone and pat this on the eyelid and carve the eyebrows. Use a fluffy brush to fade this out.
Step 3: Create The Smoke
With our Mystic Moonlight eyeshadow palette using shade Watch Me Closely, create a smokey rounded shape around the eyelid with a small blending brush, taking this to the inner and outer corner. Use a lighter shade like In My Shadows to blend this out on the sides.
Step 4: Cut The Carve
Use our Cut Carver to remove the excess eyeshadow on the eyelid that we no longer need so we have a nice clean base in the center of this so we can use our paints at a later stage.
Step 5: Apply The Paints
Take our white cosmetic paint with a #7072 flat brush and stamp that around the edge that's carved away, leaving the center free. Then use a detailed fine line brush with our black cosmetic paint to draw the details of the face. Fill in any gaps with the white paint for the full face.
Step 6: 3D Accessories
We've applied black gems on the eyes for sparkles and added fine line metallic tassels to the inner and outer eye for dramatic effect.
Step 7: Lashes
Add a lash of your choice, we've used a Voltage 4 Lash for drama. Then, finish off the face with whatever glam you fancy! We've gone for full glam, P.Louise style.
Mystic Moonlight Halloween Eye Makeup
@plmakeupacademy Under the spell of the Mystic Moonlight palette… we can’t wait to see the magical looks you create with your new Budget Box treasure 🌙 #plouise #makeup #halloweenmakeup #spookyseason #plouween ♬ No Lyrics - Kilo G
Step 1: Lay The Brows
Use Hold You Down brow gel to laminate the eyebrows flat against the skin. Brush the product up and outwards to separate the hairs. This formula is more gel-based and perfect for everyday use, compared to Brow Balm which is more of a paste.
Step 2: The Base
That's right babe, next up is the base. Use our iconic Rumour Base that matches closest to your skin tone and pat and blend that out with a fluffy blender brush. Buff the base into the brow if you have fluffy brows.
Step 3: Apply The Shadows
Using our Mystic Moonlight Eyeshadow Palette, we'll be using a mixture of black, deep blues and grey. Start with your smallest brush and your deepest shadow choice. The first blend is the most important because this is the shape that the rest of the blends will follow.
Use the 50/50 technique to build the shadows, using 50% on the previous blend with the new blend on top to create a seamless blend. keep repeating until you're happy.
Step 4: Cut The Crease
Take our Cut Carver remover and remove the shadow to create your desired shape.
Step 5: Paint & Carve
Use a lighter skin-toned shade of our Rumour Base with a #7072 flat brush to carve under that cut. Blend that over the lid and underneath, but be quick as this will dry quick!
Step 6: More Shadows
Go back on the lid with those deep blues and blacks to create a halo spotlight effect on the eye by applying the product to the inner and outer eye. Use a #119 flat liner brush with the black shadow to create the halo edge and stencil. Blend this with a fluffy liner brush and normal blender brush on the center of the lid for a smooth blend, leaving some of the base visible.
Step 7: Spotlight Eye
Use a shimmer metallic shade in the centre to create the halo and layer textures onto this. This makes the eye look even bigger and more dramatic.
Pink Cobwebs Eye Look
@plmakeupacademy Haunt them with the glam, not the gore👻✨ #plouisemakeup #halloweenmakeup #plouween ♬ Storytelling - Adriel
Step 1: Lay The Brows
Using our Brow Balm, lay the brows flat to the skin for 24 hour hold. Use the spoolie to brush upwards and outwards. This fixes the brows into position so we can see the sparse areas.
Step 2: Fill The Brows
Use our Signature Blend eyebrow palette to fill in the sparse areas of the brow with your chosen shade. Use a sharp flat brush to draw hair like strokes in the eyebrow.
Step 3: Create The Base
Using a #7071 flat brush, apply our famous Rumour Base in a matching shade to your skin across the eyelid and under the brow area, structuring and carving them out. This creates an even base so your shadows pop. Use a #124 blending brush to fade any harsh edge lines and make this look seamless.
Step 4: Apply Your Shadows
Use the dot to dot motion with a black shade to create the desired shape you want in the eye opening with your darkest shade. This is where you will build and blend your shadows. We used the Unlock Your Creativity palette and Scary Tale Endings Halloween eyeshadow palette for this look.
Using pink and purple with the 50/50 method to blend those colours further up the eye area with your lightest shade at the top. Continue to build and blend until happy with the outcome. Use a light pink shade on the side of the nose and around the edge of the outer eye area and below to soften.
Step 5: Add Eyeliner
Using our pink cosmetic paint and a fine brush, apply a hot pink to the waterline and tight to the eyeline, then use a black shade to blend below that for a darker eye look.
Step 6: Cut The Crease
Use your base and apply dots to carve out your crease. Use our Cut Carver to remove the product above the eye and in the lid. This removes everything, leaving no stains and doesn't cause products to bleed. Create the webbing shape with the cut carver where we will next apply paint.
Step 7: Apply Paint
Use our Fearless Fuschia Cosmetic Paint shade to outline the area you have just cleaned. Use shade Extra Spicy to fill in the space that's still empty. Apply the cobwebbing details with the Fuschia shade and a fine liner brush. Use our black shade to create shadows on the web.
Step 8: Finish with Lashes
Add a bold lash like Lashed in Love false lashes to finish the eye and add drama.
Halloween Pumpkin Eye Look
@plmakeupacademy Serving pumpkin spice and everything nice 🎃✨ Plouween is in full force🎀 #plouise #makeup #halloweenmakeup #SpookySeason #plouween ♬ Riptide - Vance Joy
Step 1: Lay The Brows
Using our Brow Balm, lay the brows flat to the skin for 24 hour hold. Use the spoolie to brush upwards and outwards. This fixes the brows into position so we can see the sparse areas.
Step 2: Fill The Brows
Use our Signature Blend eyebrow palette to fill in the sparse areas of the brow with your chosen shade. Use a sharp flat brush to draw hair like strokes in the eyebrow.
Step 3: Create The Base
Use a #7071 flat brush and apply our Rumour Base in a matching shade to your skin across the eyelid and under the brow area, structuring and carving them out. Pat this down to create an even base for your shadows. Use a blending brush to fade any harsh edge lines.
Step 4: Apply Your Shadows
Using our new My Forever Fall eyeshadow palette that was exclusively released in our October budget box, use a dark orange shade to create the shape above the eyelid and to frame. Use a lighter orange shade on the outer corner of the eye for a base.
Step 5: Carve Your Pumpkin
Using the Cut Carver, wipe away product to create a pumpkin shape.
Step 6: Paint Your Pumpkin
Using our cosmetic paints, draw your pumpkin out with a mix of oranges, browns and pinks until your perfect pumpkin is complete.
Step 7: Reapply the Base
Using a lighter Rumour Base, apply this on the lid where you previously applied base and blend this out with a fluffy blender brush, then apply a light orange, yellow shade and blend this into your other shadows.
Step 8: Eyeliner & Lashes
Using an eyeliner or eyeshadow, line the eyes and finish the look off with a fluffy set of Lashed in Love lashes.
Step 9: Add Extra Details
Extend your smile using our eyeshadows and liner and add gems around the eye area for extra glam.
Elphaba-Inspired Halloween Makeup
@plmakeupacademy Something wickedly glam this way comes🧙♀️ Starting off #plouween with a spellbinding witch look that’ll make ‘em fall under your charm🪄 #plouise #halloweenmakeup #witchmakeup #makeuptutorial ♬ witch.tape - SARCOMA HORROR
Step 1: Brows
Set: Brush Hold You Down Brow Fix through the brow hairs, first backwards, then in the direction of hair growth to achieve a laminated, shaped finish.
Detail: To complete the brows, we used espresso Brow Paint and a small #125 brush to create dark, hair like strokes, following your natural brow shape.
Step 2: Eye Base & Shadow
Green Base: Mix Juicy Jungle coloured eye base with a lighter 0.5 eye base and apply it to the entire eye area, blending upwards towards the brow and out towards the hairline for a smooth, semi-matte canvas.
Buff: Whilst doing this, you will need to buff your edges from the nose to hairline too, to ensure a smooth transition that will blend effortlessly when working towards the full face later on.
Shape & Depth: Using the Money Shot eyeshadow palette, start with the darkest eyeshadow colour and apply it to create the outer eye shape.
Blending (Dark to Light): Apply shadows in order from darkest to lightest (bottom to top), using a 50/50 blending motion (half on the previous colour, half on the base) to soften the edges. Use light pressure.
Layering (Light to Dark): Repeat all the shadows, but this time apply them from lightest to darkest (top to bottom) to make the colours pop and prevent a washed-out look.
Step 3: Shimmer & Liner
Shimmer Prep: Use any remaining green base product on your brush to lightly clean up the center of the eyelid. This is so we can then apply a shimmer as the tackiness will allow for it to stick but will also prevent any mucky colours showing through.
Shimmer: Apply a shimmer using a "bounce & blend" technique with a #124 flat brush. Pat the shimmer onto the center of the lid, then blend the edges into the existing matte shadows.
Half Liner: Use a black liquid liner and a #125 small brush to create a structured half-liner. Make it thicker towards the outer edge, where it should seamlessly blend into the darkest eyeshadow. Use a stamping or short sliding motion.
Waterline: Line the lower waterline with a black pencil, applying gentle pressure.
Lash: Measure and trim a false lash from the outer edge. Apply glue, let it get tacky, and then place the lash down, tucking it close to the lash line. Gently pinch the natural and false lashes together.
Step 4: Special Effects - Witch's Nose & Mole
Nose Structure: Roll a moldable wax (Ben NYE nose & scar wax) into a sausage shape. Apply Kryolan spirit gum to the skin first, then press the wax onto the nose.
Sculpting: Use a spatula to sculpt the desired nose shape, removing excess product. The edges where the wax meets the skin must be very thin for a seamless blend.
Smoothing: Use Vaseline on your finger/spatula to melt and smooth out any rough textures on the wax.
Set: Dust the entire wax area with translucent powder to remove shine and oiliness.
Mole: Apply a small dot of Kryolan spirit gum, wait for it to get tacky, then place a small ball of wax on top for the mole. Sculpt and smooth the mole with Vaseline, then re-powder.
Seal: Apply Kryolan sealer over all the wax (use an old brush as the sealer is harsh) to harden it and make it durable. Re-powder one final time to remove the shine.
Step 5: Face Base & Dimension
Green Face Base: Mix the Juicy Jungle Base with a fair-shade foundation and apply it all over the face (including the nose) using a patting/buffing motion.
Highlight: Apply the original eye base mixture to the undereye area to create a subtle highlight.
Blush: Gently tap a preferred shade of Cheek Of It blusher over the cheekbones for a touch of glam. Soften the edges.
Contour (Gaunt Look): Use the darkest green eyeshadow (Hollywood) to contour the face for a gaunt appearance. Brush it from the top of the ear toward the outer eye and down to the jaw. Also apply it to the jawline, chin, and forehead, blending upwards with minimal product. Continue the colour down the neck along the bone structure.
Step 6: Finishing Touches
Mole Colour: Colour in the mole with the espresso brow paint.
Lip: Paint the lips using a black paint and a #7072 crisp brush, making sure to shape the cupid's bow.
Gore: Splatter Ben Nye Stage Blood over the lips and pull it onto the face using a stippling sponge for an extra gore factor.
And there we have it. An Elphaba inspired makeup look, just in time for Halloween and for the release of Wicked 2. This last one was a little harder but the pay-off is incredible. Hopefully this has inspired you to give these looks a try, you've got all the tools you need and all the steps!